Introduction
Writing a comprehensive article about the technique of reverse lens mounting is a rather complex process, mainly due to the many theoretical and practical considerations and the questions of what to omit and how deep to delve in order to keep the article general, while maintaining the necessary parameters. Nevertheless, I will attempt to describe the issue briefly and simply, both for readers who are photographers and have never encountered reverse lens mounting, as well as for those who have tried or are interested in this previously popular and inexpensive method of capturing images (reverse technique).
What is macro photography?
Before we delve into the method, let’s briefly define what macro photography is. It refers to the photographic process and recording of an image that has a more detailed structure than the human eye can discern at a distance of 25 centimeters. A more precise definition considers the necessary condition of magnification in a scale ranging from 1:1 to 30:1. This ratio simply represents the size of the subject projected onto the sensor (or film) relative to the actual size of the object.
Definition of reverse lens technique)
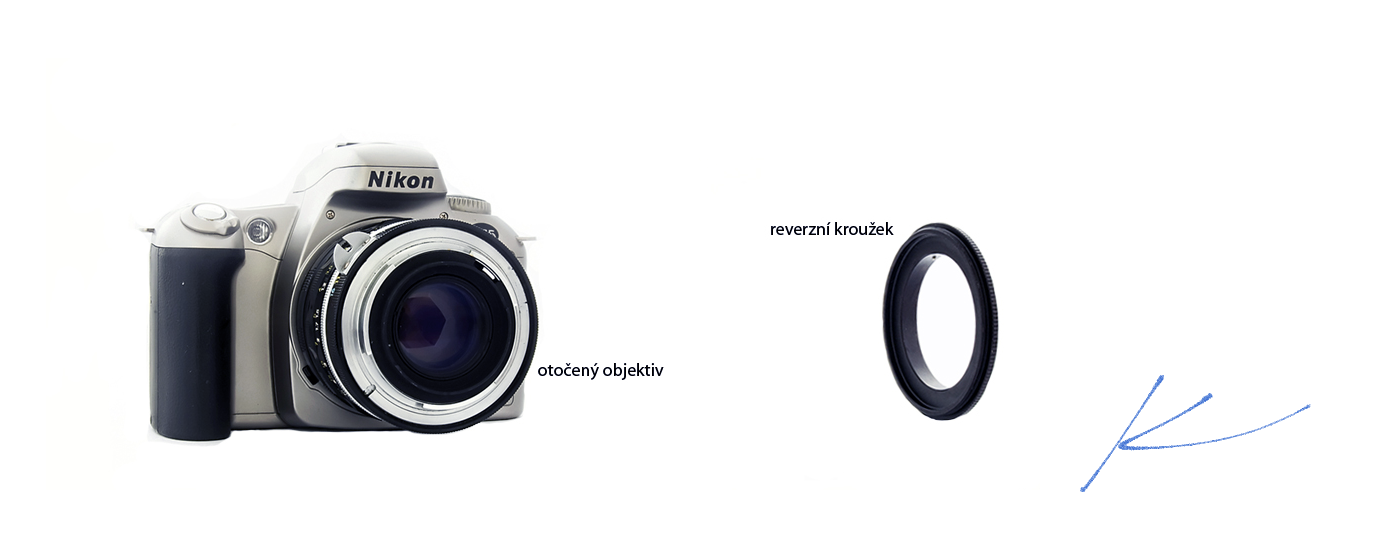
Reverse lens technique in photography allows you to practically reverse any lens and attach it to the camera body. The front element of the lens attaches to the camera mount, while the rear element faces outward. A lens reversal ring is used for attachment. It is simply a metal reduction ring with a camera mount on one side and a thread on the other side. For example, if you own a Nikkor lens with a 58mm filter diameter and want to use it on a Nikon body, you would need a lens reversal ring that has a Nikon mount (F mount) on one side and a 58mm thread on the other side. With lens reversal, you can attach any optical system without being limited by the lens brand or its compatibility with the camera body. When purchasing a lens reversal ring, you need to consider the type of camera mount and the required diameter of the optical system.

Diagram
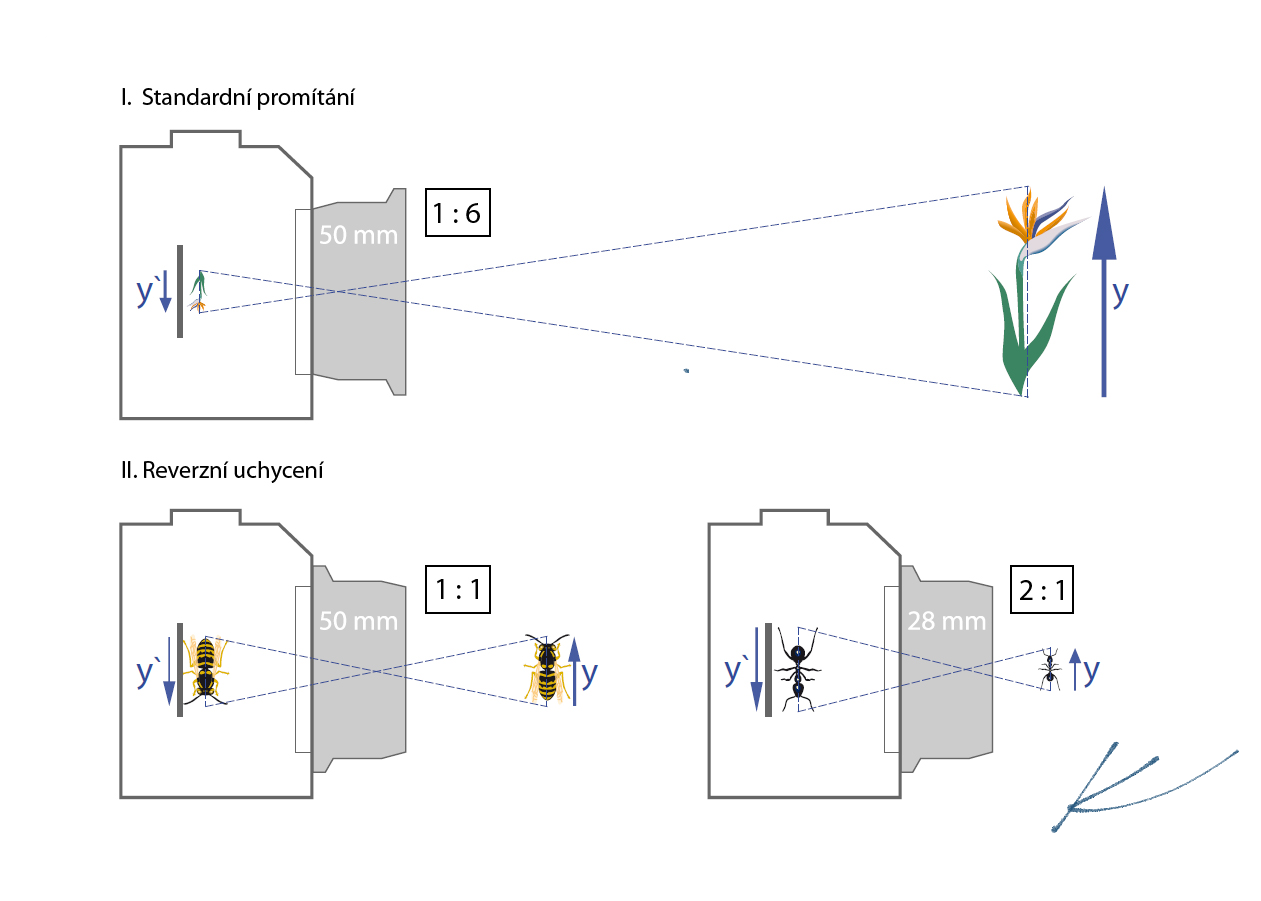
In the following diagram, I have depicted the behavior of a lens with a focal length of 50 millimeters. Glass with such parameters usually has an approximate magnification scale of 1:6, which means that the image (y’) is projected onto the sensor/film at one-sixth of its actual size (y). By reversing the lens, the values are identical, i.e., y’ = y. For comparison, a reversed optical system with a 28mm focal length is also shown, which projects an image that is twice as large as its actual size. Logically, we can deduce that the wider the angle of the lens, the higher the magnification scale we can achieve with lens reversal.

Magnification scale
Types of lenses suitable for reverse mounting
Ideal solution are prime lenses with an aperture ring. You can also use modern prime lenses, as well as standard zoom lenses with a common aperture (i.e. approximately up to f/5.6). Modern lenses without manual aperture control are slightly more complicated.
Lenses with an aperture ring
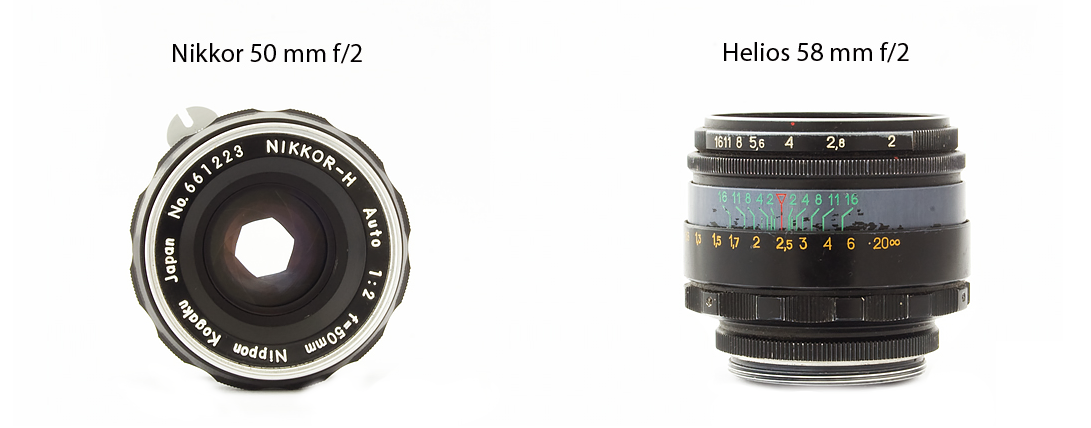
Due to the minimum required magnification of 1:1, lenses with a focal length of 50 millimeters or less are suitable. The aperture value can be controlled directly on the lens. Since reverse technique is the most cost-effective solution, I recommend using old manual lenses. Affordable options are those with an M42 mount (for Pentax, Zenit, Praktica, etc.). An inexpensive M42 lens is the Helios 58mm f/2, which does not give an exact 1:1 magnification when reversed, but it is highly popular for other macro photography techniques (extension tubes, bellows, combined with reversing) and for its legendary bokeh and fine rendering of details, making it ideal for portraits. Other options are affordable Nikon and Canon FD lenses. AI and AIs versions of Nikkor lenses can be successfully used on digital Nikons in the normal position, while with Canon lenses it’s not as straightforward, as Canon has changed its mount several times throughout its history. FD lenses need to be connected via an FD/EOS adapter for standard use.
Here are some examples of lenses:
M42 mount lenses
- Pentacon 29mm f/2.8
- Zeiss Pancolar 50 f/1.8
- Yashica Auto Yashinon DS 50 f/1.4
- Super-Takumar 50 f/1.4
- Helios 58 f/2
F mount lenses
- Nikkor 28mm f/2.8 AIs
- Nikkor 35mm f/2 AI
- Nikkor-H 50mm f/2 AI
FD mount lenses
- Canon FD 35mm f/2.8
- Canon FD 50mm f/1.8

How to use a lens without an aperture ring
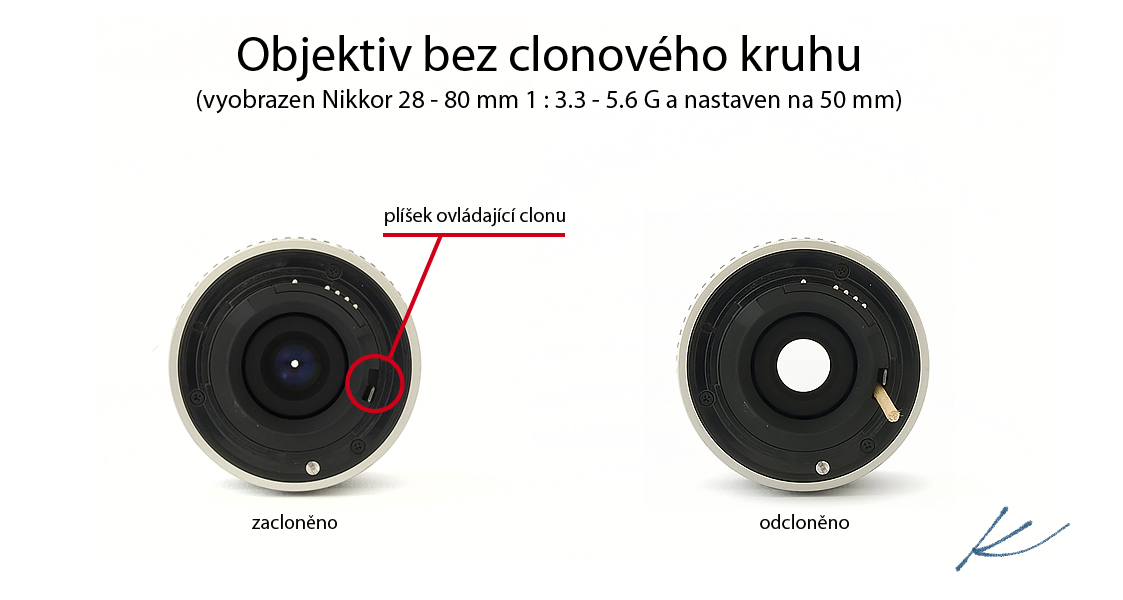
Most modern lenses do not have an aperture ring, only a metal plate controlling the aperture opening (see the image below). The plate has a curved path and is attached to a spring. When disconnected from the camera body, the spring returns it to the extreme position, i.e., the highest possible aperture value.
How to set the aperture? There are several options. The simplest variant involves placing an obstacle so that the plate cannot return to the extreme position. In nature, a piece of woody part of a plant can serve this purpose. How can you guess which aperture value is set? Since the aperture number f is determined by the ratio of the lens focal length to the diameter of the entrance pupil, we can quickly determine the result. Although precise knowledge is not necessary in this case, simply fix the plate’s movement within a range, for example, less than half of its total movement. Look through the viewfinder and take the photo.

Another option is to use an adapter that changes the aperture. It’s an attachment that screws onto the back of the lens. It has a lever that you can move to change the position of the aperture plate. Original adapters from Nikon even have an input for a cable release, allowing the user to set the exact aperture value without having to intervene in the scene during photography. It’s an interesting little gadget, especially for precise aperture settings. The usability of, for example, the Nikon BR-6 adapter and the AR-10 cable release, considering the prices of both products (see the dealer’s website), is a question that I leave to the readers for consideration.
Tip: Canon owners can easily fix the aperture value of a modern lens (same brand). Simply set the desired aperture number f with the lens properly attached, then press and hold the depth of field preview button while disconnecting the lens from the camera body. Give it a try.
Examples
The following photographs were taken with a standard zoom Nikkor 28-80mm f/3.3-5.6 G lens as test shots during the time when I was starting with reverse lens photography.

Conclusion of Part One
In the next part of the theory, we will focus on the exposure of the images and the procedure for photographing using reverse lens mounting. We will discuss the issue of depth of field (DOF) and compare the options of external and internal flashes. Looking forward to seeing you soon, Karel Chytil.

Finálna podoba článku je spracovaná spôsobom, ktorý prináša čitateľovi určitú hodnotu a odborný prehľad. Stručne, zaujímavo, zrozumiteľne a jednoducho popísaná problematika poukazuje na vynikajúce – teoretické i praktické – skúsenosti a poznatky autora v danej oblasti.
Výborná práca 👌📷